|
|
|
|
|
|
|
|
|
|||||||


|
Features
All About Lenses Reach
Out And Touch Someone Using the telephoto end of your zoom is the perfect solution. You can capture the sweat rolling down the pitcher‚s face as he tries to throw the final strike, nail that Grizzly from a safe vantage point, and even shoot some interesting cityscapes where buildings appear to be piled together due to the visual compression that long telephoto lenses produce. The biggest problem when shooting with zoom lenses at extreme telephoto settings is camera shake. It‚s similar to looking through a high-powered telescope where every movement you make is magnified. Here‚s where the most hated accessory in photography, the tripod, should be used. While not as heavy and cumbersome as they used to be, tripods are still not fun things to drag around. Yet, to keep the camera steady at zoom settings, there‚s nothing better. The next best thing is a monopod or a body brace but if you must hand hold the camera, here are two helpful tips. First, use the focal length of the lens setting as your shutter speed. If you are shooting with the 35mm equivalent of a 400mm lens, set your shutter speed to 1/400th second or faster. Second, put your arm through the camera strap so that the strap crosses your back and ends up under your right armpit. Then adjust the strap so the camera rests tightly against your eye when you push your forehead against it. You can also use this technique to steady the camera when shooting at slow shutter speeds under low light conditionsųyou‚ll get acceptably sharp images down to 1/4 second once you master this technique.
Finally, your depth of field will be very shallow. This can be a blessing or a curse, depending on the effects you‚re after. A blessing if you want to selectively focus on something and let the background go soft as Sports Illustrated Photographer David Bergman (www.davidbergman.net) did in his shot of then NY Yankees Pitcher Hernando „El Duqueš Orlandez (see next page), shot with a 520mm (35mm equivalent) lens on his Canon EOS1D Mark II. But if you want moving subjects at full zoom to stay in focus, for example, a football player as he weaves down the field, narrow depth of field can be a curse. Even with the lens stopped down its smallest aperture it will be difficult, if not impossible, to achieve this. So here‚s a tip: When shooting action, prefocus on one spot and then shoot when your subject „hits the mark.š You‚ll still end up with a lot of out-of-focus shots but so do the pros. Wider
Is Better First, you pick up great depth of field. You can disengage your camera‚s autofocus, set the camera to a fixed distanceų10 feet, for exampleųand even if the camera shoots at a moderately large lens opening, everything will stay in focus from up close to far away. For digital cameras, this means less shutter lag and faster shot-to-shot time because the camera doesn‚t have to waste a lot of time focusing. You can mingle at a party and concentrate on the action without worrying about your shots being out of focus. You can also fit more people into a group shot without having to scrunch them together or back so far away that your flash won‚t reach. And shooting at a wide-angle setting minimizes camera shake, even at slow shutter speeds. It also gives you the largest possible aperture your lens is capable of. How‚s that? If you look at those little numbers engraved on your zoom lens, you‚ll see something like 1:2.8 - 4.8. The first aperture number (2.8) is the largest lens opening at the full wide setting while the second (4.8) is what it will shift to as you zoom to extreme telephoto. In this case that‚s a difference of about 1.5 stops! Looked at another way, shooting wide instead of telephoto lets you use faster shutter speeds to avoid camera or subject motion because you have a larger aperture available. Choosing a wide field of view also gives your image a marvelous feeling of space. Telephoto settings compress thingsųlike the shot of „El Duqueš where the crowd seems to be right behind him when actually they‚re a fair distance away. Wide-angle views, on the other hand, expand the spaces between objects and subjects. And this can be used to create visually exciting images the eye usually doesn‚t notice. You can frame your shot so that parts of the picture in the foreground become large and imposing while the background falls off into space such as David Bergman‚s shot of singer Gloria Estefan kicking a beach ball (see picture on page 30), taken with the 35mm lens equivalent of about 20mm on his Canon EOS1D Mark II. Of course, this also can produce distortion, but so what? Sometimes our eyes need to be forced to see the world with new vision. Some of history‚s greatest artists painted distorted views of reality and most of us appreciate their unique way of seeing. If they‚d been photographers, they‚d have been ecstatic over wide-angle lenses. So should you. Move in close and see how different subjects and objects look. Shoot some exterior or interior scenes with the camera tilted and revel in the distortion. You may even want to try some extreme wide-angle close-ups of your family, friends or pets for humorous results; the parts of their bodies closest to the camera will be huge while the rest of them will be tiny. Until recently, digital camera manufacturers shied away from fitting cameras with zoom lenses that had good wide-angle capabilities. They claimed that pulling back to those settings would cause light rays to hit sensors at too extreme an angle, resulting in a loss of definition and underexposure at the corners of the image. But now specially designed wide-angle zooms for digicams are beginning to appear and you‚ll be able to get more dramatic pictures with an increase in quality. Once you get the knack of wide-angle shooting, telephotos will seem tame and you may well agree with the pros that wider is better. Up
Close And Personal A plant leaf can become a beautiful design element, its veins forming fascinating patterns. Commonplace objects can take on new meanings; the reflections of light and color on the surface of a spoon can yield exciting abstract images. If you don‚t like to wander out in search of photographic subjects, not to worryų you‚ve got a whole universe right around your own house. Using the optical viewfinder of your camera is usually not an option because just moving the camera a few millimeters one way or the other when composing an extreme close-up can throw your subject right out of the frame. But you can see exactly what you‚ll get on the LCD monitor or through the viewfinder of a digital SLR. The closer in you get, the less depth of field (range of sharpness from nearest to furthest object) you‚ll have. In fact, if you shoot something larger-than-life-size, depth of field can drop to just a few millimeters. While this can be an advantageųto soften backgrounds when you want to selectively focus on your main subjectųit‚s wise to shoot extra exposures at a series of smaller lens openings just to make sure you have adequate depth of field. When using smaller apertures, achieving correct exposure will require shooting at slower shutter speedsų in some cases 1/2 second or longer. So you‚ll want to use a tripod whenever possible to avoid camera shake. You‚ll also want to release the shutter without jabbing it with your finger, so use a remote electronic release or, if your camera can‚t do that, set the self-timer to release the shutter (finally, a use for that usually useless feature). If you‚re in really super close, make sure your equipment doesn‚t cast a shadow on your subject. And when using flash or another light source, try to have it come from the side, the rear, or even directly through the object (if it‚s translucent). This will provide interesting textures and dramatic lighting. You can also build a „tentš of white sheeting around three sides of the object and aim your light at the outside of the tent, which will spread very even lighting on the object insideųsimilar to the light on an overcast day as opposed to harsh, direct sunlight. The slightest subject motion becomes magnified when you shoot extreme close-ups and images can easily become blurred. If your subject moves (like flowers in a slight breeze) wait for the right moment and take several shots to cover yourself. You can also shoot at a higher ISO. By using ISO 400 instead of ISO 100, you can either stop down the lens for more depth of field or shoot at a faster shutter speed to limit motionųor a combination of both. At higher ISOs you may also pick up some digital artifacts (noise) but that‚s preferable to an unsharp image. Moving in to the extreme will guarantee exciting and unusual pictures and you‚ll find a myriad of objects and subjects to photograph in your own backyard. If that‚s still too far afield, just stay inside. There‚s a lifetime worth of images waiting to be captured there, too. OFFBEAT
LENSES The Lensbaby is a modern-day version of a soft-focus lens with a twistųyou can choose which part of your image you want to be sharper while letting the rest of it go soft. It‚s all done by, yes, twisting a flexible piece of tubing in which a lens element is mounted. This isn‚t rocket science and you‚ll quickly get the hang of it, reveling in all the kooky effects you can achieve. You hold the camera as you normally would and then extend the second and third finger of your left hand to focus by push-pulling the lens while you wiggle it from side to side for the effect you want. After awhile, it becomes second nature and you get completely drawn into the images you‚re creating. You can even screw 37mm-threaded add-onsųwide, tele, close-ups, and filtersųonto the Lensbaby to increase its versatility. A number of them are available as accessories at the Lensbaby site. The lens comes with a set of disks to set the aperture at f/2.8, f/4, f/5.6 or f/8ųeach opening giving a different ratio of sharpness-to-softness for an almost infinite number of effects (my favorite is f/2.8). When set to Aperture Priority, most cameras will handle the exposure while you fiddle with the composition. If yours won‚t, here‚s a chance to set it on Manualųsomething I know you‚ve just been itching to do. Shoot a couple of test exposures, pick the best, and use those settings. If you don‚t feel a rush of creative juices after seeing the resultsųnot unlike the look of many of the artsy-craftsy images taken with classic „toyš cameras such as the Diana and Holgaųyou‚re probably hopeless; give up photography and start chopping wood. On the other hand, if you like everything sharp as a tack this may not be your cuppa tea, either. Give it a try anyway. Who knows, you might find one of your Lensbaby masterpieces hanging in a museum some day. US$ 96 at www.lensbaby.com. Next, consider the Samyang mirror lens. No, it doesn‚t make you look fat or thin, as the name might imply; it‚s actually a unique telephoto lens that uses a series of internal mirrors to cut down on its size and weight. So instead of requiring a mule to cart it around, you can slip all of its 12.7 ounces and 3.4-inches of length into your camera bag and set off for the high mountains or local sports arena armed with 500mm of telephoto power which will become the 35mm focal length equivalent of 750mm to 1,000mm depending on which dSLR you have. It can also focus as close as 5.6 feetųtry that with a lot of super-long lenses. Its aperture is fixed at f/8 so you‚ll need some light to shoot withųa lot of it if you‚re going to hand-hold the lens and shoot at a fast enough shutter speed for steadiness. One of the reasons it fell out of favor after being all the rage in the 1950s is that overexposed highlight areas look like little doughnuts (though this can now be fixed in Adobe Photoshop). You must also manually focus, although most cameras will automatically calculate the exposure when they are set to Aperture Priority. The Samyang is a nice piece of glass to have in your arsenal and it can be mounted on almost any dSLR camera because it uses T-mount adapters (See DIY, New Life For Old Lenses). And it‚s inexpensive. You can buy it used on eBay for about US $50 or new for US $109 at B&H Photo (http://tinyurl.com/5juzh) where it goes under the name of Phoenix. Make sure you also order a T-Mount adapter (about US $15) for your camera model.
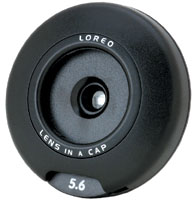
If you feel the need to return to simpler times (and who doesn‚t), you‚ll want to order their Lens In A Cap. For just US $19 (including shipping) you‚ll be able to turn your high-priced dSLR into a lightweight, no-frills point-and-shoot. No kidding! It‚s like hitching your Porsche to a couple of horses to evoke the feeling of the good old days. You get a 3-element fixed-focus lens in a body cap that bayonets into your lens mount. It has a focal length of 35mm (about 50mm to 70mm depending on your dSLR camera) with a maximum aperture of f/5.6 stopping down to, whoa there, f/64! Now for the first time, digital camera enthusiasts can join (in spirit, anyway) Edward Weston‚s f/64 group and get everything (kind of) in focus from up-close to infinity. But wait, there‚s more. If you buy their pocket-sized 10x loupe, the Lubot, for an additional US $11, you can combine it with the Lens In A Cap to shoot ultra macrosųthere are some pretty impressive examples at their web site. The Lubot is also a lean, mean, little viewing machine in its own right. It has a high tech, three element aspheric lens which produces sharp images across the entire viewing area. And you may also be able to use it for ultra-macros in conjunction with some of your regular lenses. Finally, why spend a small fortune on a PC (perspective correction) lens, when for only US $21 you can get a PC Lens In A Cap? OK, I know it sounds ridiculous, but it really works! Although designed primarily for 35mm format, I was able to do a moderate amount of shift corrections (both vertically, horizontally, and diagonally) on a Canon 20D, a Pentax *istD, and an Olympus E-300. Loreo
makes other fascinating (and inexpensive) lens gizmos, such as a
3-D system for digital cameras that‚s really innovative. If you
know how to cross your eyes, they have plenty of examples on their
site that you can enjoy. Then, just order theirųyep, you guessed
itų3-D Lens In A Cap and enter the world of digital stereo photography.
www.loreo.com. |
||||||
|
|
|||||||
|
©
2004 D.C. Publications, Inc. All Rights Reserved. |
|||||||
 When
using extreme telephoto settings, be aware of haze and smog, which
will make your images look unsharp and decrease their contrast.
There are haze filters available, but they are only marginally effective
when you set your zoom to its telephoto limit, so pick your weather
conditions carefully, especially when shooting landscapes.
When
using extreme telephoto settings, be aware of haze and smog, which
will make your images look unsharp and decrease their contrast.
There are haze filters available, but they are only marginally effective
when you set your zoom to its telephoto limit, so pick your weather
conditions carefully, especially when shooting landscapes. 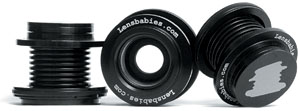 There
have always been weird and whacky lenses photographers have used
to achieve special effects or just for the fun of it. Here are a
few you might want to take for a spin on your dSLR.
There
have always been weird and whacky lenses photographers have used
to achieve special effects or just for the fun of it. Here are a
few you might want to take for a spin on your dSLR. 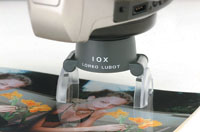 You‚ve
probably never heard of Loreo and neither had I until I chanced
upon their web site and was intrigued by the lens products this
Hong Kong firm was manufacturing. Their company slogan: „Creating
Solutions Through Lateral Thinkingš clued me in that I was entering
the realm of the unusual.
You‚ve
probably never heard of Loreo and neither had I until I chanced
upon their web site and was intrigued by the lens products this
Hong Kong firm was manufacturing. Their company slogan: „Creating
Solutions Through Lateral Thinkingš clued me in that I was entering
the realm of the unusual.