|
|
|
|||||||||
|
|
Reviews
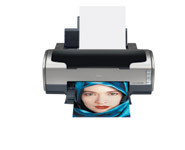
Epson Stylus Photo R1800 Epson has dealt with this problem in the R1800 by adding a gloss optimizer cartridge. Now the glossy prints look exactly like photographic glossy prints. The first use I made of this printer was catching up on my backlog of family and personal pictures. I made dozens of 4x6s and 5x7s, all borderless. The R1800 uses 8 cartridges: Cyan, Magenta, Yellow, Matte Black, Photo Black, Red, Blue, and Gloss Optimizer. No need to switch Photo Black and Matte Black and the need to purge the lines. The printer makes the choice based on the paper profile you‚ve picked. The Blue and Red cartridges add brilliance to those color ranges. The blue tones such as skies seem richer, but I didn't notice a big change in the reds. In general, a wide range of subjects printed very well. Gone are the Light Magenta, Light Cyan, and Light Black of the 2200. Epson did not think of the R1800 as a replacement for the 2200. (At the time of this writing, there is a new 2400 which is replacing the 2200). These light cartridges which allowed the photographer to make very photographic looking prints also seemed to reduce the longevity, it is believed by people who do this kind of accelerated testing.
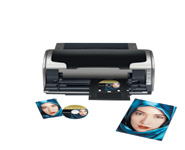
Epson‚s longevity numbers for the R1800 have been upped beyond the 2200. Over 100 years is claimed for the glossy paper and as much as 200 years for Epson Water Color Radiant White. The speed of the printer is very impressive and it is very quiet while printing. An 8x10 print on letter paper takes about a minute and a half at Photo resolution (1440 ppi) and about two minutes and a half at Best Photo Resolution (2880 ppi.). There is a Photo RPM setting (5760 ppi) which uses more ink and takes longer but it won‚t make a discernable difference in print quality, in my opinion. I‚m surprised that the software workflow on a Mac has not been improved since the switch to System X. System 9 had much fewer menus and windows to deal with. On my G-4, using Panther, I counted 18 mini-decisions that I had to make for each print. At first, all these menus are a bit daunting but it does become a routine after a while. Why, after picking the correct paper in the print with preview window, a different paper is listed in the later print settings window. Also, if you are using more than one printer, invariably the „wrong‰ printer is indicated in one of the windows. This problem is not special to the R1800, but exists for all the Epson printers on Mac System X. The printer has four paper inputs. The regular tray that is located on the top that works by gravity and can be loaded with more than one sheet of paper and is the normal one to use. Another input is located at the back of the machine for special papers (Watercolor Radiant White and Velvet Fine Art). Another input for roll paper and a special tray that loads from the front of the machine for printing on printable CDs and DVDs. There is also a special piece of software for formatting the information that you might want to print on a CD or DVD. In conclusion, I must say that though I have a choice of printers that are connected to my computer, I‚ve been consistently picking the R1800 for most of my printing. It‚s good for my glossy snapshots but it is equally good for exhibition and display prints. Epson
Stylus Photo R1800 Printer ˆAl
Francekevich
|
||||||||
|
|
|||||||||
|
©
Digital Camera Magazine. All Rights Reserved. |
|||||||||
 My
first impression of the R1800 was the terrific gloss. With my earlier
Epsons (the 2200 and the 2000P), I rarely made high gloss prints.
I favored the semi-gloss and the luster papers which most resembled
the photographs I had produced in many years of darkroom work. The
occasional glossy prints I tried on Epson Printers had patches of
dullness in the highlight areas. This is a phenomena called "bronzing."
My
first impression of the R1800 was the terrific gloss. With my earlier
Epsons (the 2200 and the 2000P), I rarely made high gloss prints.
I favored the semi-gloss and the luster papers which most resembled
the photographs I had produced in many years of darkroom work. The
occasional glossy prints I tried on Epson Printers had patches of
dullness in the highlight areas. This is a phenomena called "bronzing."
 The
paper profiles supplied by Epson in the printer driver software
are very good ˆ better than earlier Epson profiles. For most uses,
simply using these profiles was satisfactory. For exhibition prints,
I like to run small test prints before running the larger print.
I run a 4x5‰ test in one corner of an 8.5x11‰ sheet using the same
paper as the finished 13x19‰ print. This is accomplished in the
print with preview window by unchecking „center print‰ and checking
„show bounding box.‰ You can then drag one corner or the bounding
box to make the picture about 4x5 and place it in the corner of
the paper. If the test looks right, I go for the big print. If not,
I make small changes in Photoshop, place the picture in another
corner, and run a new test on the same sheet of paper. These tests
run quickly, use a minimum amount of ink, and give you a very accurate
preview of what your big print will look like. This procedure lets
you still use the profile which generally is very close and make
small tweaks in Photoshop.
The
paper profiles supplied by Epson in the printer driver software
are very good ˆ better than earlier Epson profiles. For most uses,
simply using these profiles was satisfactory. For exhibition prints,
I like to run small test prints before running the larger print.
I run a 4x5‰ test in one corner of an 8.5x11‰ sheet using the same
paper as the finished 13x19‰ print. This is accomplished in the
print with preview window by unchecking „center print‰ and checking
„show bounding box.‰ You can then drag one corner or the bounding
box to make the picture about 4x5 and place it in the corner of
the paper. If the test looks right, I go for the big print. If not,
I make small changes in Photoshop, place the picture in another
corner, and run a new test on the same sheet of paper. These tests
run quickly, use a minimum amount of ink, and give you a very accurate
preview of what your big print will look like. This procedure lets
you still use the profile which generally is very close and make
small tweaks in Photoshop.