|
|
|
|||||||||
|
|
Peripherals Reviews Eye-Fi Card
2GB of storage and WiFi in a standard SD Card!
The idea here is to give you a storage card that can wirelessly upload your pictures from any camera that uses SD cards for storage to any Windows or Mac OSX computer. Or upload them to a photo sharing site. Or both. All without needing one of those special wireless-enabled cameras or even a special menu on the camera. And without being forced to use a specific photo sharing site.
In each case you're asked to set up an account with your email, name and a chosen password. The Eye-Fi Manager then checks your firewall and looks for available wireless networks. You can then choose which of them to add to the Eye-Fi card (if you go elsewhere, you can easily add more networks). You are then prompted to select from a number of available web photo sites. Currently supported are:
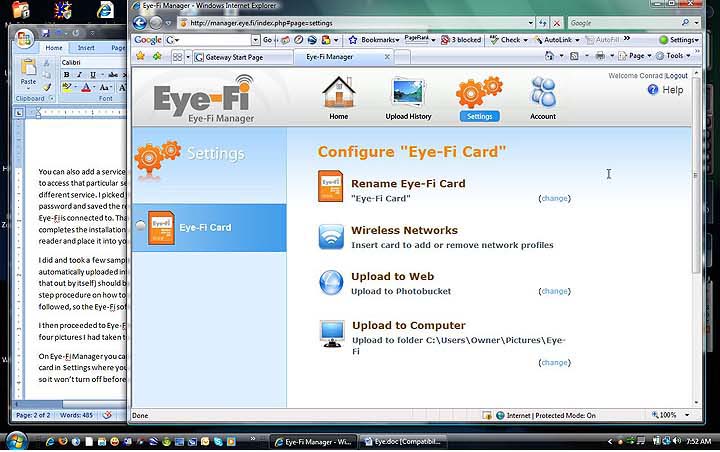
Below you can see the Eye-Fi configuration screen:
So I placed the Eye-Fi card into one of my digital cameras and took a few sample pictures. Amazingly, almost as soon as I'd taken them, they were automatically uploaded into my PC. Eye-Fi Manager alerted that I should make sure my Casio (it figured that out by itself what camera I was using) should be set so it wouldn't turn off during long file transfers and offered a step-by-step procedure on how to change the settings on the camera. Unfortunately, only a blank space followed, so the Eye-Fi software must not have the instructions for all cameras.
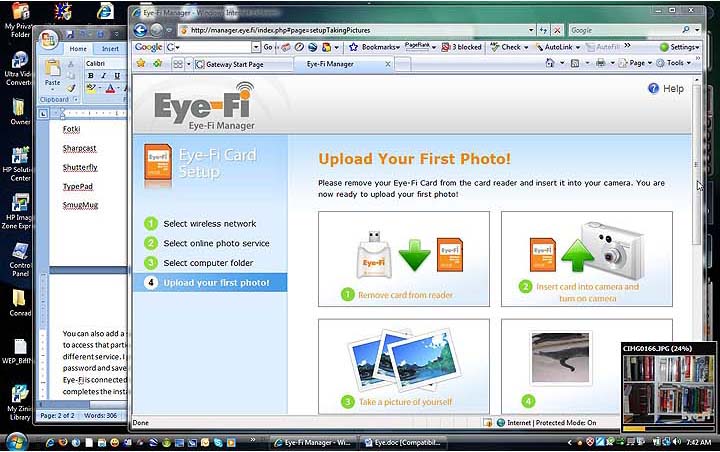
I then proceeded to Eye-Fi Manager and found that the card and software had not only uploaded the four pictures I had taken to my computer, but also already to PhotoBucket (which I had authorized). Below you can see the screen that instructs what to do after initial configuration. The little window at the right bottom pops up when the Eye-Fi card uploads pictures into your computer. It shows image file number and upload progress in percent.
On Eye-Fi Manager you can check your upload history, add more wireless network profiles to the Eye-Fi card in Settings where you can also add or remove online photo services, change camera power settings so it won't turn off before uploads are completed, and there's also a Help section. Now obviously you may not want all your pictures sent to a photo sharing service sight-unseen, and this can be done by changing the setting so that web upload is not automatic. Under "Advanced" in Settings, you can click to add the tag "Eye-Fi" to photos for services that support tags.
You can also instruct the Eye-Fi Manager to not upload pictures to the computer. That way you can wait and enable uploading for when it is convenient. As is, I took the camera and walked around my house, taking more pictures, then returned to the computer. Within half a minute or so, the new pictures were uploaded into my computer. I turned "Upload to Web" back on, but now Eye-Fi Manager did not automatically upload the new pictures. If "upload to web" is turned off when the camera uploads to the computer, you then have to manually upload pictures to your web service.
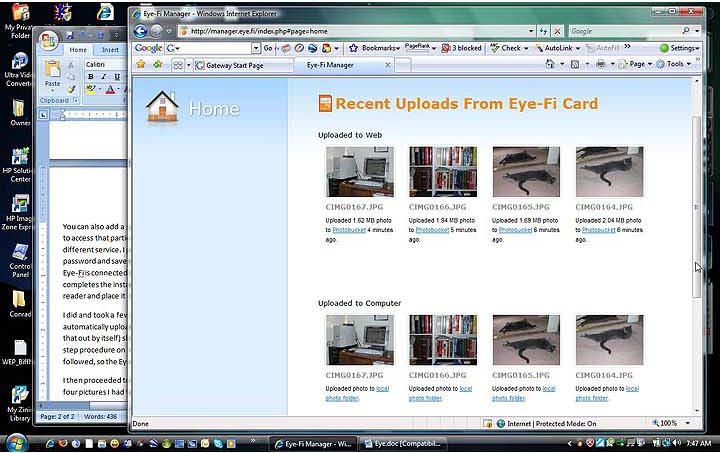
Below is a screen that shows recent uploads both to the web and to the local computer.
On a Gateway Vista notebook in the same room as the Access Point, there was a five of five bar connection strength and all worked well, but then Eye-Fi Manager froze. The Windows Task Manager claimed that Internet Explorer, in which the Eye-Fi Manager is running, was consistently hogging 65 to 95% of CPU, and the Internet Explorer window showed the dreaded "(Not Responding") message. When I asked Vista to check for a solution, it simply restarted Internet Explorer. I double-clicked on the Eye-Fi Manager icon to restart the application, but nothing happened. I stuck the Eye-Fi card into its reader and it properly mounted and I could see the files on it. I put the card back into the Casio camera and took another picture. Would it be sent to the PC? Yes, within about a minute, the small upload window opened on the notebook and I saw the picture being loaded. Truth be told, I am more inclined to blame Vista here than the Eye-Fi software, and the glitch did not repeat.
After these minor glitches, I simply began using the Eye-Fi card and what I found was very impressive.
What makes the Eye-Fi card so special is that it's so simple. From its size and shape that's no different from a standard SD card to the unobtrusive way it works, it's just wonderful. The Eye-Fi card is also not limited to one camera. You can stick it into any camera with an SD Card slot you so happen to take along and the Eye-Fi card will dutifully upload pictures taken. So you just snap along and the pictures are automatically uploaded as soon as the camera is within range of the notebook with the Eye-Fi Manager software.
One thing to be aware of is that the camera must be on for the pictures to upload. A couple of times I expected the pictures to have been uploaded but only found one or two. That's because my Pentax K10 dSLR was set to go to sleep after a brief period of inactivity. It'd be great if the Eye-Fi card were to wake up the camera, or keep it awake, until all pics are uploaded, but perhaps that's too much to ask as the Eye-Fi firmware on the card would have to know how to wake up every camera on the market.
On the PC/Mac software side, the version of the Eye-Fi Manager that came with my card showed an upload history of pictures to my photo share service, but not yet a history of what pictures were loaded onto the PC. That feature supposedly becomes available in a future version.
So I must admit that I wasn't sure I was going to like the Eye-Fi card. But it quickly made me a believer. The magic of the Eye-Fi card is that it is so simple. Getting 2GB of storage and completely transparent and automatic upload of pictures, that's a very good thing. Overall, the Eye-Fi card, which retails for US$99.99 with 2GB of storage, is a total winner. The only fear I have now is that I might lose the card. Storage cards are so small these days, it's easy to misplace them. That's probably why they made the Eye-Fi orange. This way it sticks out.
We like:
Not so much:
Click to see the Eye-Fi website.
|
||||||||
|
|
|||||||||
|
©
All Rights Reserved. |
|||||||||
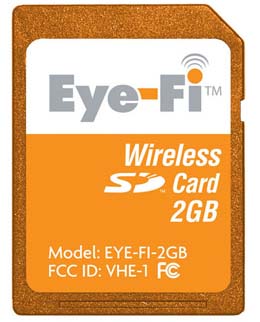 The folks at Eye-Fi Inc. did something amazing. They combined 2GB of storage and a full 802.11b/g wireless radio on a single SD card. And it is just that, a standard, regular SD card, no longer or thicker than any other SD card.